12 min to read
DevSecOps with Azure Pipelines
With great apps, comes great security responsibility.
What is DevSecOps
DevSecOps means different things to different people. For the purpose of this post, I will define it as:
DevSecOps is the introduction of security as an integral part of the application lifecycle.
Let me explain.
In my experience, security is often the last thing that people think about when they are trying to get something done. In many cases, security teams are only engaged at the final stages of a project and serve only as a hoop that must be jumped through before a project or product can be completed. By that time it’s way too late.
While this type of thing happens across all areas of security, let’s focus on this problem as it relates to application development.
As deadlines loom closer and project budgets dry up, it’s very common that by the time security teams are engaged, there’s no time or money left to fix any of their findings. This often leads to exemptions in security policies, which without proper governance or compensating controls, can ultimately lead to a degradation of security posture overall.
If left unchecked, this can also negatively transform security culture by changing the perception of the security teams to blockers of progress, when all they are trying to do is keep the organization, your software and your customers safe.
Security is everyone’s responsibility
The culture of security needs to change. The securing of code, or application and infrastructure architecture is not something that can be hospital-passed onto a separate team of people to inject into a project at the last minute. That’s just like giving a machination of monkeys a license to drive and expecting the police to keep the roads safe.
Security is not a noun; it’s a discipline
To be successful in securing our code, applications, and infrastructure, we need everyone to be thinking with a security mindset right from the start. Security needs to be part of the discussions at the very beginning of any new project, and continuously in the minds of every developer. Every function, method, and library that gets committed to source control needs to be checked against security controls to prevent the introduction of risk or vulnerability into the production environment. We need to “shift-left” from pre-delivery to pre-build. This is DevSecOps.
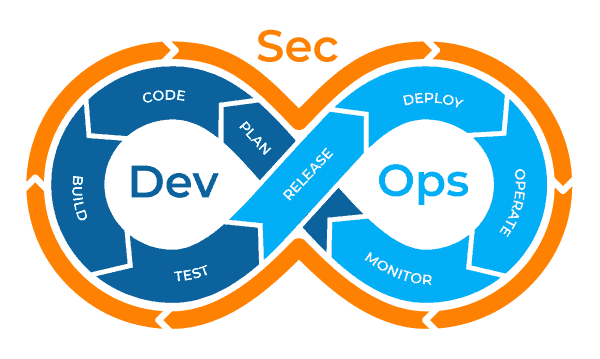
How does one Sec a DevOp?
All that sounds hard. Real hard. And truth be told, it is. At the risk of sounding cliché, DevSecOps is not a destination, it’s a journey. It’s a refactor of culture and mindsets complimented by automated tooling and reporting.
To help us all along this journey, the Cloud Security Alliance (CSA), who are the world’s leading organization dedicated to defining standards, certifications and best practices to help ensure a secure cloud computing environment, have released The Six Pillars of DevSecOps.
- Collective responsibility: Everyone has their own security responsibility and must be aware of their own contribution to the organization’s security stance. Edge users and developers are not just “security-aware” but are the first line of defence.
- Collaboration and integration: A security-aware and collaborative culture are necessary for the members of all functional teams to report potential anomalies.
- Pragmatic implementation: Taking a framework-agnostic, digital security and privacy model that focuses on application development will allow organizations to approach security in DevOps pragmatically.
- Bridging compliance and development: The key to addressing the gap between compliance and development is to translate applicable controls to appropriate software measures and identifying inflection points within the software lifecycle where these controls can be automated and measured.
- Automation: Software quality can be enhanced by improving the thoroughness, timeliness and frequency of testing/feedback. Processes that can be automated should be, and those that can’t should be considered for elimination.
- Measure, monitor, report and action: For DevSecOps to succeed, software development and post-delivery results must be continuously measured, monitored, reported and acted upon by the right people at the right time.
These six pillars aim to ensure that DevSecOps is a part of a well-thought-out design principal (rather than a bolted-on afterthought) to enhance an organization overall security posture.
There’s a lot to chew on there and getting into all the details is a mini blog series in itself, but we’ve covered off a few of them already. Let’s touch on a few more as I demonstrate how to integrate automated security testing into your CI/CD pipelines.
DevSecOps with Azure Pipelines
To give this post a narrative, I’ll share with you how I build this website. I’ll be attempting to achieve the outcomes of pillars 5 and 6 by integrating automated security scanning and reporting into my site’s CI/CD pipeline.
Behind the curtain
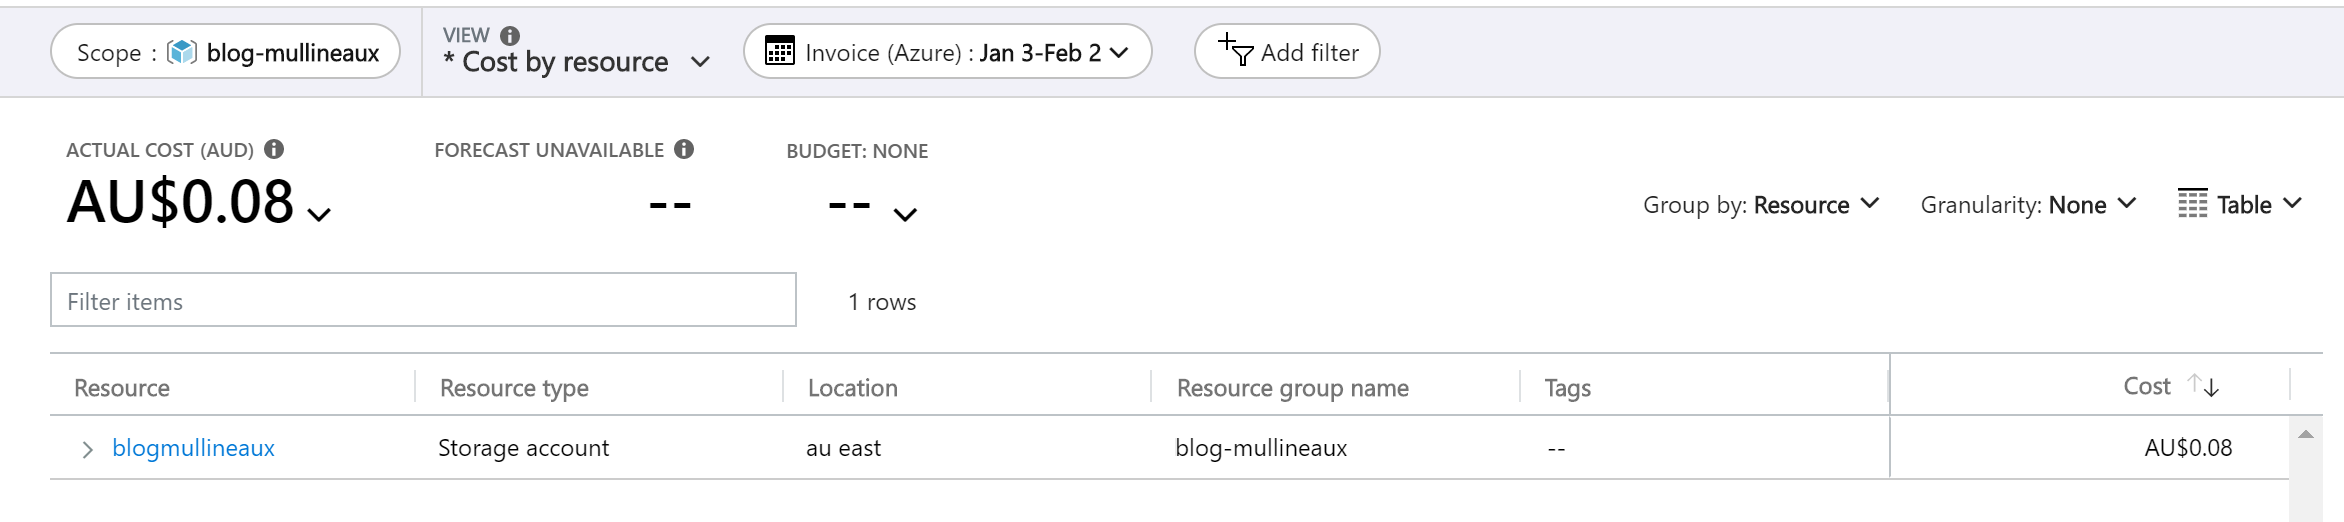
This website is built using a static site framework called Jekyll. I author my posts using markdown and use Jekyll and Azure Pipelines to compile my site into static HTML pages. I then host those pages out of an Azure storage account using Azure static sites which is fronted by CloudFlare.
For those that are interested, that’s a total hosting cost of ~$0.08/month.
I keep my site in source control within Azure Repos and when I commit changes to the master branch it triggers my CI/CD pipeline to build the site and upload it to the Azure storage account.
OWASP ZAP
The Open Web Application Security Project (OWASP) is a nonprofit organization that works to make the web a safer place for everyone. One of their ongoing projects is the publication of the OWASP Top 10 which is a security awareness document that is globally recognized by developers as the first step towards more secure coding.
The folks at OWASP have also created and open-sourced a tool called the Zed Attack Proxy (ZAP) that enables anyone to test their applications or websites for security vulnerabilities.
This is how I’m going to get automated security testing and reporting into my build pipeline.
Azure Pipelines OWASP ZAP Scanner
The Azure Pipelines extension marketplace is where you can download and install extensions to give your Azure Pipelines additional functionality.
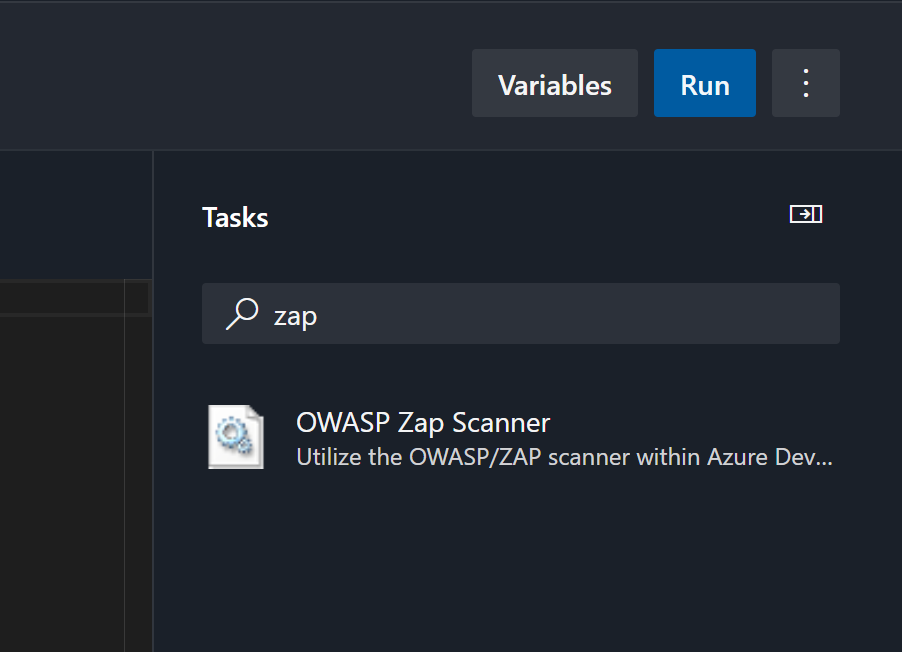
Searching for the word “zap”, I download and install the OWASP ZAP Scanner extension.
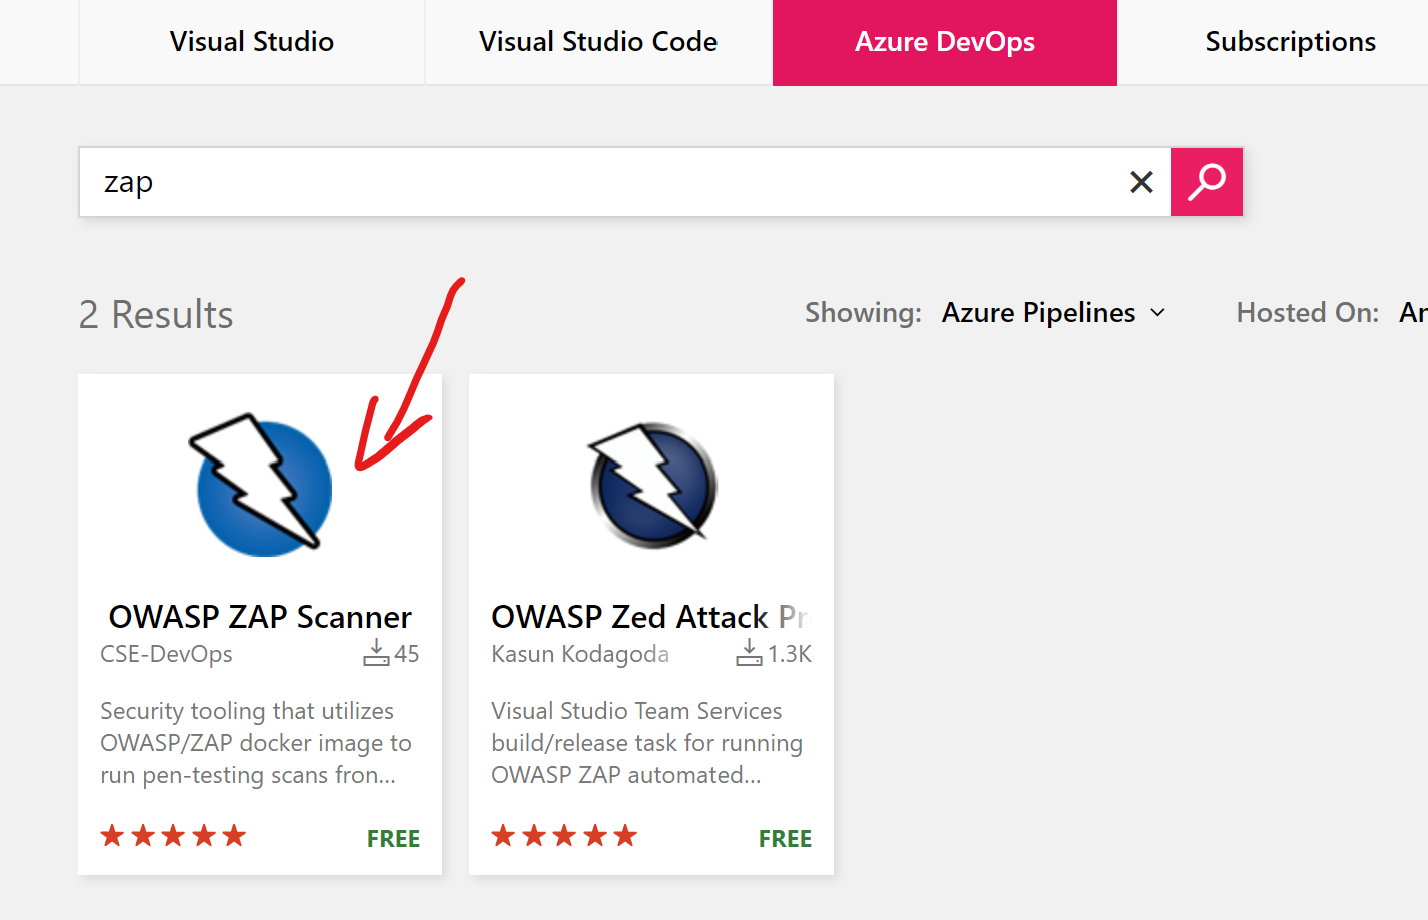
This adds a new task within my task library inside Azure Pipelines.
When added to my pipeline, this task will download and run a docker container that runs ZAP and will scan the URL that I configure in the task properties.
My website pipeline
My build/release pipeline for my website looks like this.
Stage: Build
- Download Jekyll and pre-requisites (ruby)
- Use Jekyll to build the site
- Publish the compiled site as a pipeline artifact
- stage: build
  jobs:
    - job: build
      steps:
      - task: UseRubyVersion@0
        inputs:
          versionSpec: '>= 2.5'

      - script: gem install Jekyll bundler
        displayName: install jekyll and bundler

      - script: bundle install
        displayName: install gems

      - script: bundle exec jekyll build
        displayName: build website

      - task: CopyFiles@2
        inputs:
          SourceFolder: '_site'
          Contents: '**'
          TargetFolder: '$(Build.ArtifactStagingDirectory)'
        displayName: Copy "_site" to staging directory

      - task: PublishPipelineArtifact@1
        inputs:
          targetPath: '$(Build.ArtifactStagingDirectory)'
          artifact: '_site'
          publishLocation: 'pipeline'
        displayName: publish artifact
Stage: Release
- Download pipeline artifact
- Download & install
azcopy(need the latest version to use thesynccommand) - Upload contents to the Azure storage account
- stage: release
  jobs:
    - job: publish
      steps:
        - download: current
          artifact: _site

        - script: |
          wget -O azcopy.tar.gz https://aka.ms/downloadazcopylinux64
          tar -xf azcopy.tar.gz
          sudo ./install.sh
          sudo ln -s /usr/bin/azcopy /usr/local/bin/azcopy
          displayName: update azcopy

        - task: AzureCLI@2
          inputs:
            azureSubscription: 'MSDN Contributor'
            scriptType: 'bash'
            scriptLocation: 'inlineScript'
            inlineScript: |
            # Fail on errors, output every command and result to the log
            set -e -x

            # upload files
            az storage blob sync --source _site --container \$web --account-name $(storageAccount) --verbose
            workingDirectory: '$(Pipeline.Workspace)'
          displayName: Update storage account
Security scanning a website
As mentioned earlier, the ZAP task requires that I specify the URL of the website I want to scan. If you’re lucky enough to have implemented a blue/green deployment strategy, you can point this at your staging environment, however, in my case, that’s not something I can do with Azure static sites.
To give ZAP something to scan, after the build compiles my website I add a new build step to launch my website in an apache docker container on the build agent.
- bash: |
    docker run --rm --volume="$PWD/_site:/usr/local/apache2/htdocs" -p 8080:80 -dit httpd:2.4
    displayName: Docker - run website
Now I can configure the ZAP build task to scan my compiled website that’s running in the container.
- task: owaspzap@1
    displayName: OWASP ZAP security scan
    inputs:
      threshold: '50'
      port: '8080'
Here I’ve set the threshold to 50. This means that if ZAP finds 50 or more issues, this build step will fail. Keep in mind that this refers to 50 occurances of an issue, not 50 separate issues. This means that if a singular vulnerability exists more than 50 times across all pages on my website, the build will fail.
Breaking the build at this early stage of the application lifecycle means that I am eliminating the opportunity for insecure code to be released into my production environment.
Reporting
ZAP produces an HTML report of all the security problems which can then be uploaded as a build artifact. However, with a little manipulation, it can be converted into an NUnit test result format which will be recognized as a comprehensive test within Azure Pipelines.
The OWASP ZAP Scanner marketplace page has detailed instructions on how to do this, but I’ll run through it quickly here.
- Use the handlebars templating engine to create the HTML template /dashboard that is accessed on the Tests tab of a build
- bash: |
    sudo npm install -g handlebars-cmd

    cat <<EOF > owaspzap/nunit-template.hbs


    <test-run
        id="2"
        name="Owasp test"
        start-time=""  >
        <test-suite
            id=""
            type="Assembly"
            name=""
            result="Failed"
            failed="">
            <attachments>
                <attachment>
                    <filePath>owaspzap/report.html</filePath>
                </attachment>
            </attachments>
        <test-case
            id=""
            name=""
            result="Failed"
            fullname=""
            time="1">
                <failure>
                    <message>
                        <![CDATA[}]]>
                    </message>
                    <stack-trace>
                        <![CDATA[
    Solution:
    }

    Reference:
    }

    instances:
    *
        -
        - }
                        ]]>
                    </stack-trace>
                </failure>
        </test-case>

        </test-suite>
    </test-run>

    EOF
    displayName: 'Bash - Install handlebars and generate report template'
    condition: always()
- Use
handlebarsto take the output of the ZAP scan, pass it into the template, and generate an NUnit test result
- bash: ' handlebars owaspzap/report.json < owaspzap/nunit-template.hbs > owaspzap/test-results.xml'
  displayName: 'generate nunit type file'
  condition: always()
- Publish the NUnit test result
- task: PublishTestResults@2
    displayName: Publish Test Results owaspzap/test-results.xml
    inputs:
    testResultsFormat: 'NUnit'
    testResultsFiles: 'owaspzap/test-results.xml'
    condition: succeededOrFailed()
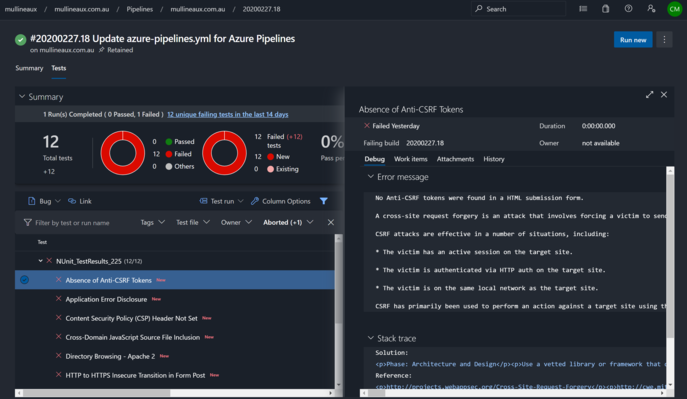
With the report publishing configured, whenever I run a new build a comprehensive report is generated and accessible from the Tests Tab of the build that was executed.

Clicking on any of the failed tests opens up details about the vulnerability and a suggested solution on how to resolve it.

If you’ve followed along and got this far, congratulations! You’ve Sec’d your first DevOp.
As for me, it looks like I’ve got a bunch of work to do …


Comments